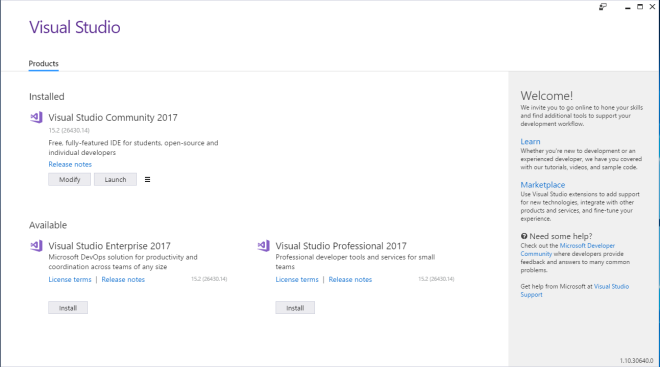
- Download Visual Studio 2017 installer from visualstudio.com and RUN it.

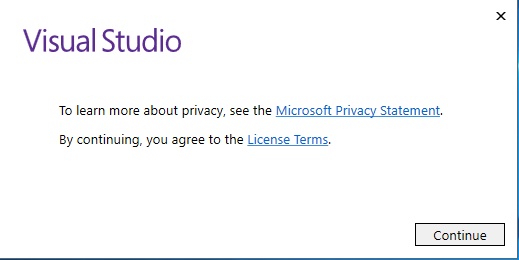
- You will need to Agree to the terms of Microsoft on the first start of Visual Studio 2017 installer.
- Then wait for the initialization of the installer.
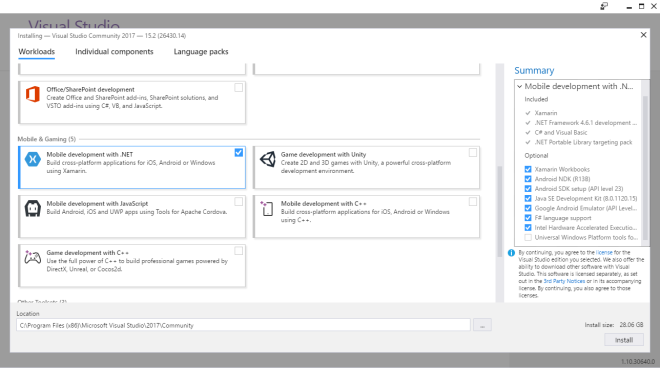
- After initialization is completed, you should see the following screen. Under Mobile & Gaming category, select Mobile development with .NET component. Then click Install button to start the installation.
- Visual Studio 2017 installer will start installation and it took about 30minutes to complete in my machine. (Very fast compare to Visual Studio 2015)
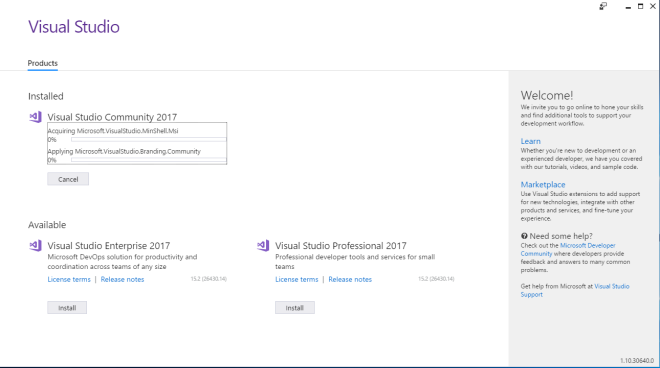
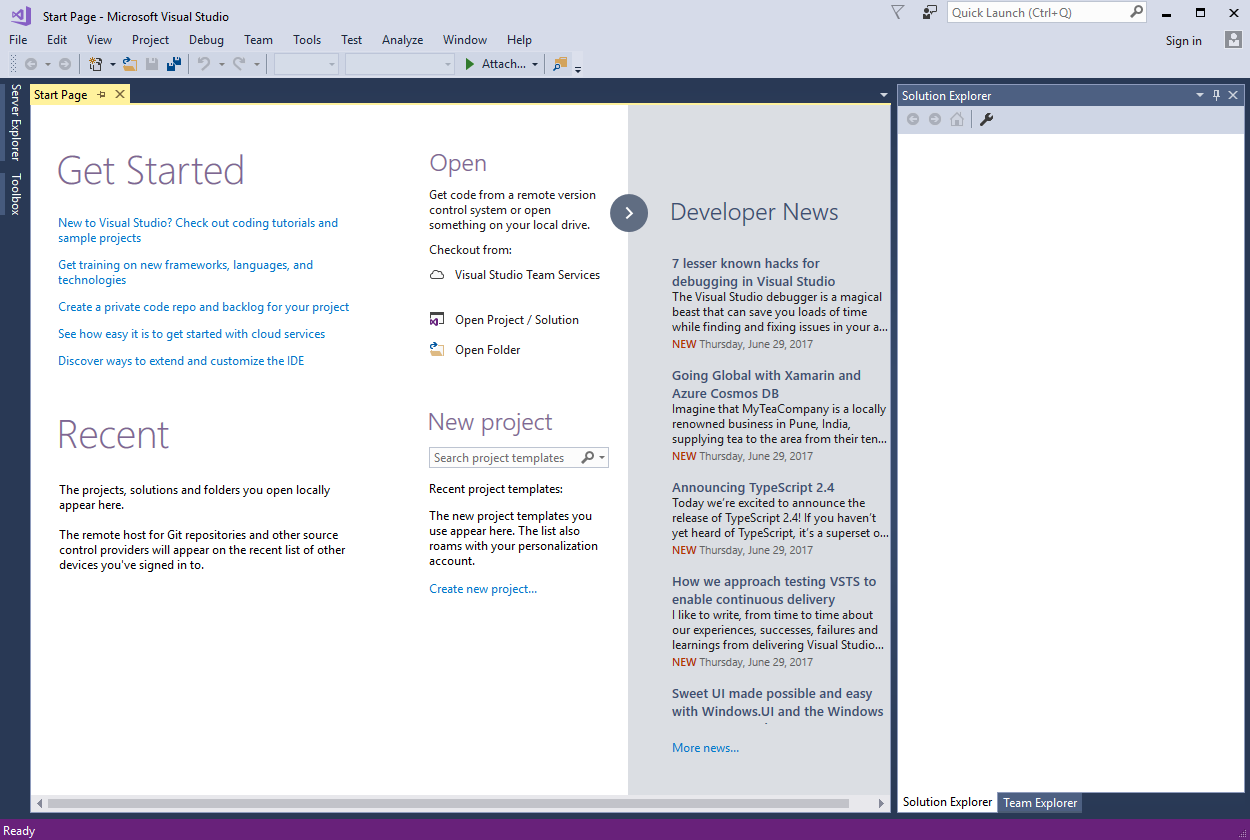
- When the installation is completed, you will see the following screen. Just click on Launch button to start Visual Studio 2017.
- Visual Studio 2017 is now installed with Xamarin and ready to rock.
- Surprisingly the latest Visual Studio 2017 installer did not give any installation problem this time. Everything is installed correctly and the process is so smooth. Thumbs up for Microsoft and Xamarin team.
- If you need to setup Android Emulator, please refer to this POST.
- If you need to setup connection to Mac, please refer to this POST.
Tag: visual studio
Setup and Install Xamarin for Visual Studio 2015: Xamarin Mac Agent
Setup Visual Studio Connection To Mac
In order to build and debug iOS project in Visual Studio, we need to configure Visual Studio to connect to a Mac machine in network or Mac in cloud.
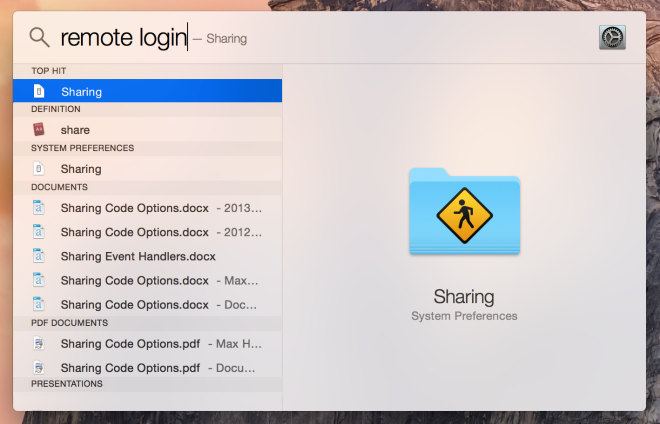
- We need to setup the Mac first to allow the connection. Open Spotlight (Cmd-Space) and search for Remote Login and then select the Sharing result. This will open the System Preferences at the Sharing panel.
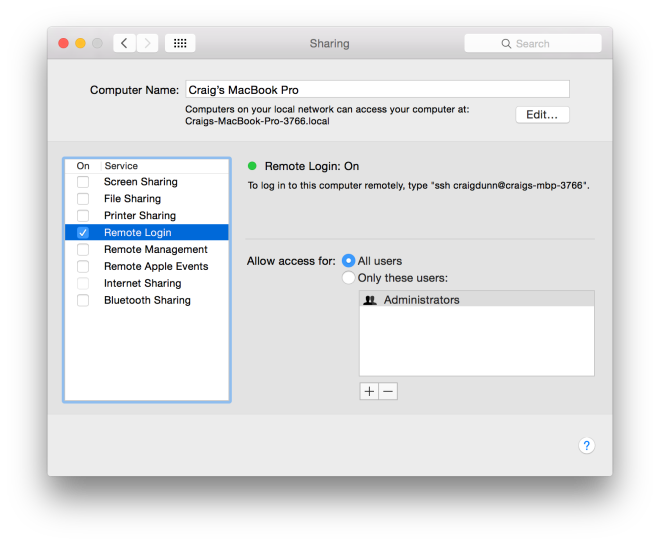
- Tick the Remote Login option in the Service list on the left in order to allow Xamarin for Visual Studio to connect to the Mac. Make sure that Remote Login is set to allow access for All users, or that your Mac username or group is included in the list of allowed users in the list on the right. The Mac should now be discoverable by Visual Studio if it’s on the same network.
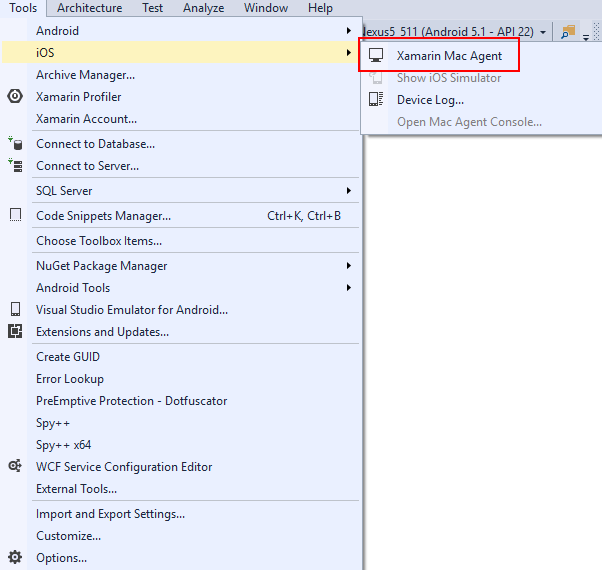
- Back to Windows and open Visual Studio. Go to Tools>iOS>Xamarin Mac Agent
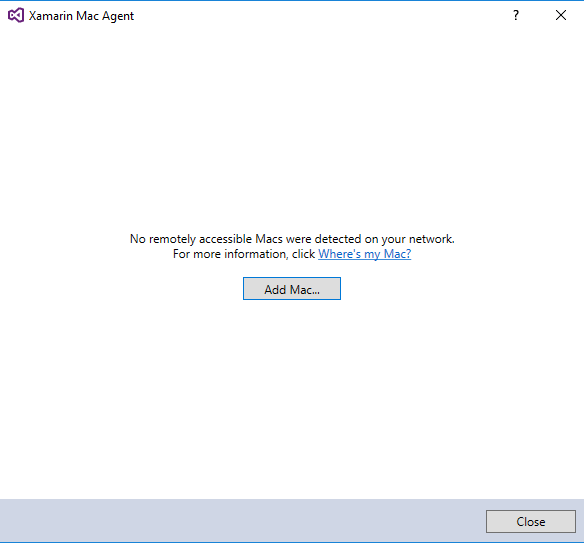
- If the Mac is not setup correctly, you will see the following dialog. You can try to add the Mac manually by clicking the Add Mac button and put in IP address of the Mac. If it is not able to connect, you will need to check the setup in Mac. You can also try ssh to the Mac to test the connection between Visual Studio and Mac.
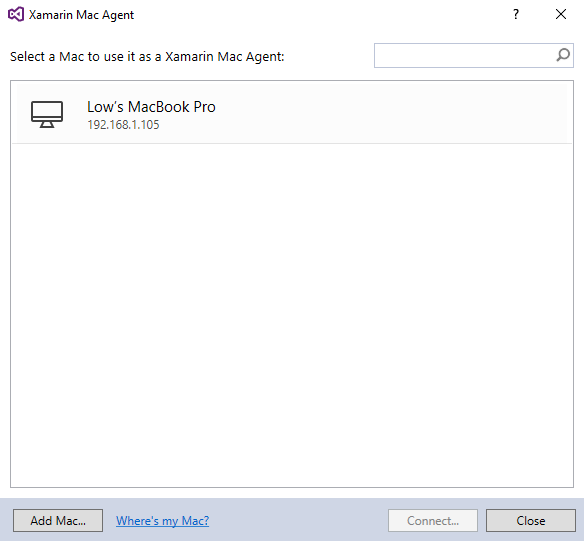
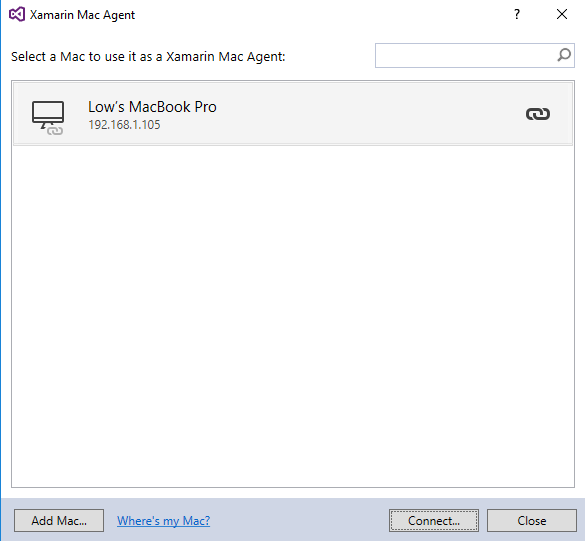
- If there is a Mac setup correctly, you should able to see the Mac showing in the list. You can now select the Mac and click on Connect button.
- If the connection is successful, you will see a dialog prompt ask for credentials. Please input the username and password that you have configure for Remote Login in the Mac.
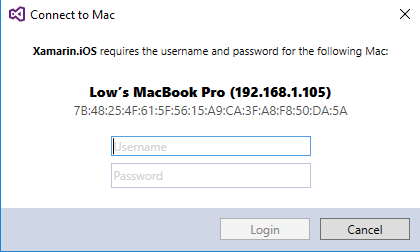
- If the credentials is correct, you should be now connected to the Mac.
- Close the dialog and you should be able to Build and Run iOS project now.
- Note: Please make sure that both Windows and Mac is having same version of Xamarin in order for the connection to work.
You can find the other parts of the guide here:
Setup and Install Xamarin for Visual Studio 2015: Android Emulator
There is many options available for Android Emulator. I will list down a few:
- Android SDK Emulator
- Visual Studio Android Emulator
- Xamarin Android Player (Deprecated but still usable if you only need older emulator)
- Genymotion
- Bluestacks
Note: You can always debug using actual Android device instead of using Emulator for debugging.
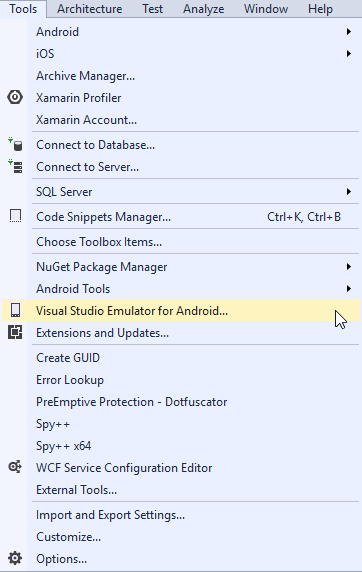
If you need to turn ON Hyper-V in your machine, you will need to go with Visual Studio Android Emulator. To open/configure Visual Studio Android Emulator, go to Tools>Visual Studio Emulator for Android…
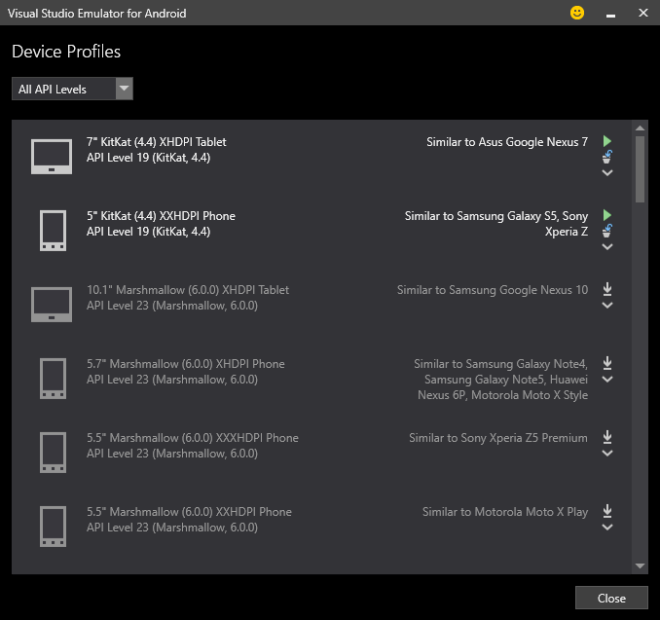
You will be able to launch or configure the emulator in the new dialog popup. For details guide on Visual Studio Android Emulator please refer HERE.
This guide will be about how to work with Android SDK Emulator.
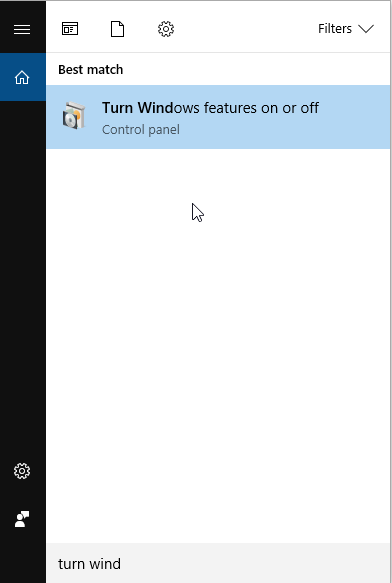
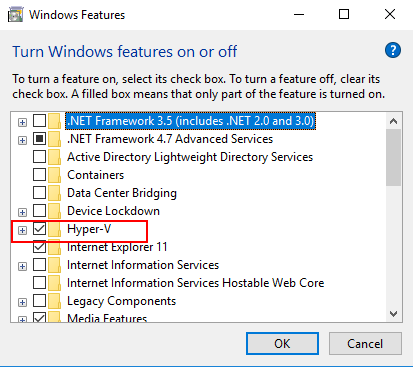
- To make Android SDK Emulator run without lagging, we will need to install Intel HAXM. However, Intel HAXM cannot work together with Hyper-V. So, we need to turn OFF Hyper-V in the machine. Open search windows and search for Turn Windows features on or off and open it.
- Uncheck Hyper-V and restart PC. (If your PC do not have this Hyper-V features, it means that Hyper-V is not supported. So you can skip this step)
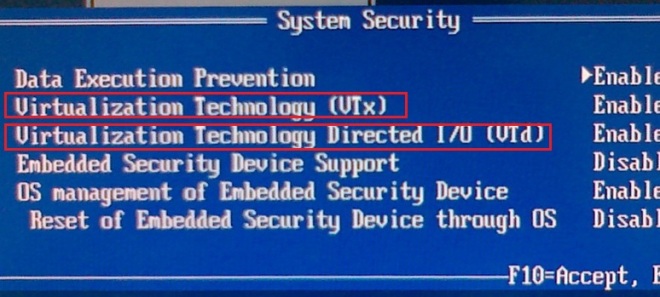
- Make sure Virtualization Technology settings is Enable in BIOS settings.
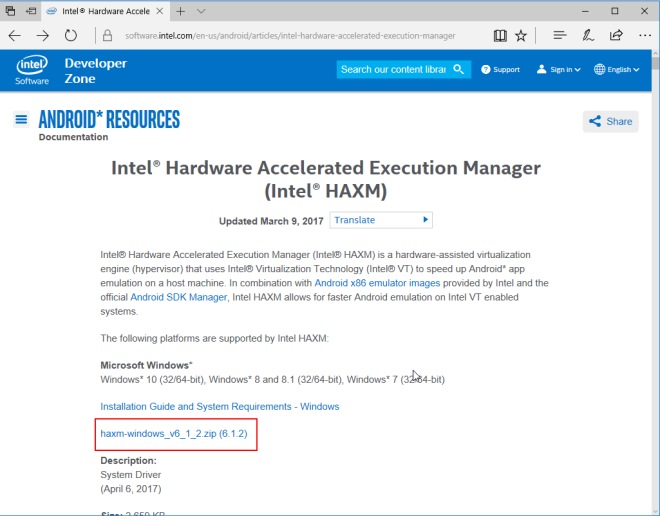
- Download Intel HAXM installer HERE.
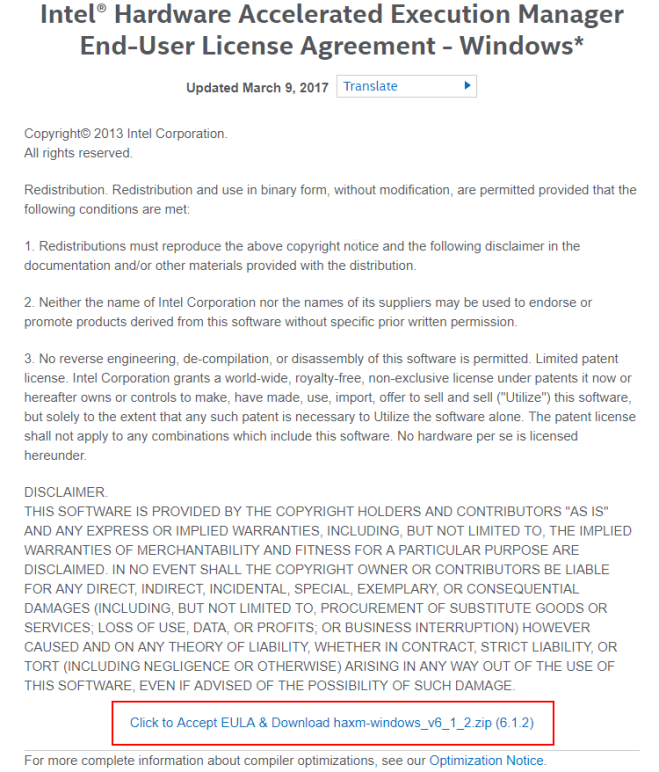
- Remember to agree on the EULA to start the download.
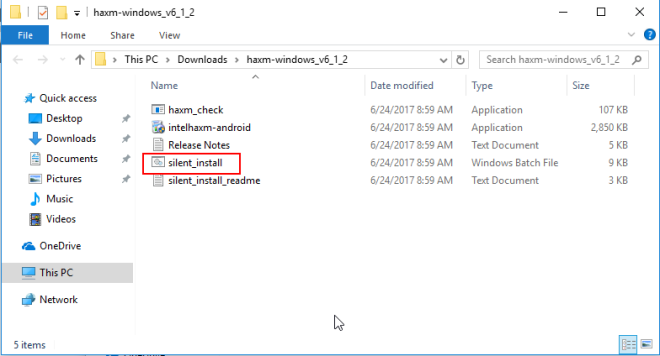
- After downloaded, extract the zip file. You should have the following files in the zip file. Open command prompt and RUN silent_install.bat. Intel HAXM installer should be running.
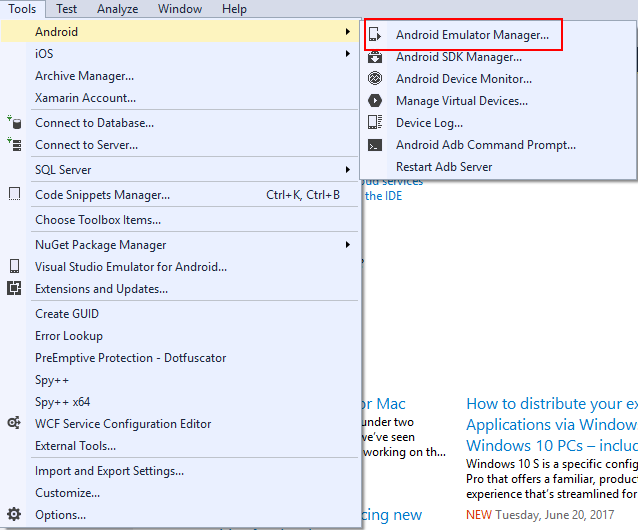
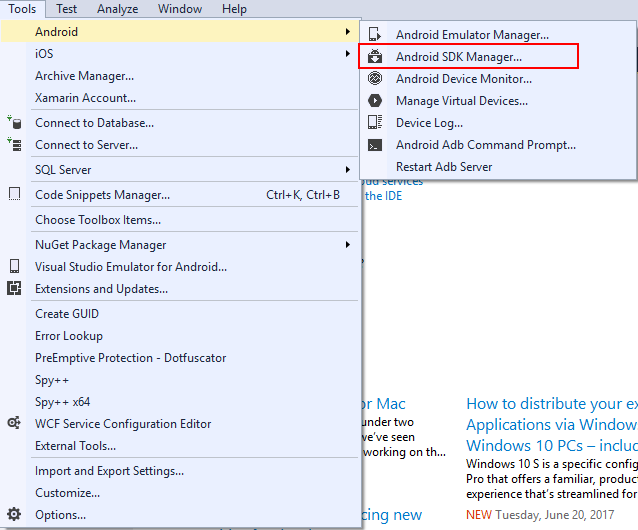
- After Intel HAXM is installed, we can now proceed to setup the emulator. Open Visual Studio and go to Tools>Android>Android Emulator Manager
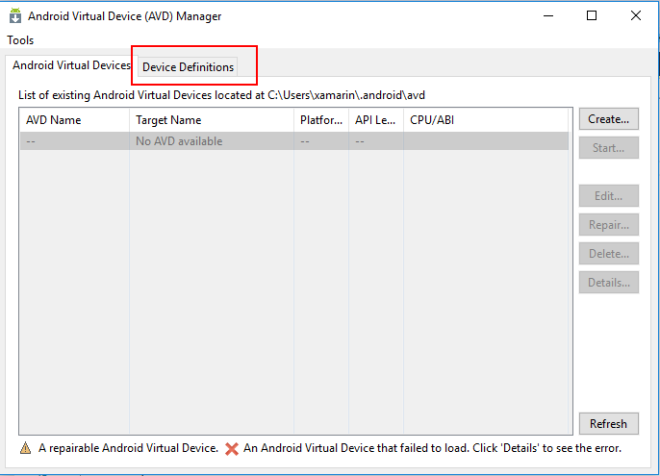
- Android Virtual Device (AVD) Manager dialog should be popup. It might take some time to show if your machine is slow. Click on Device Definitions tab.
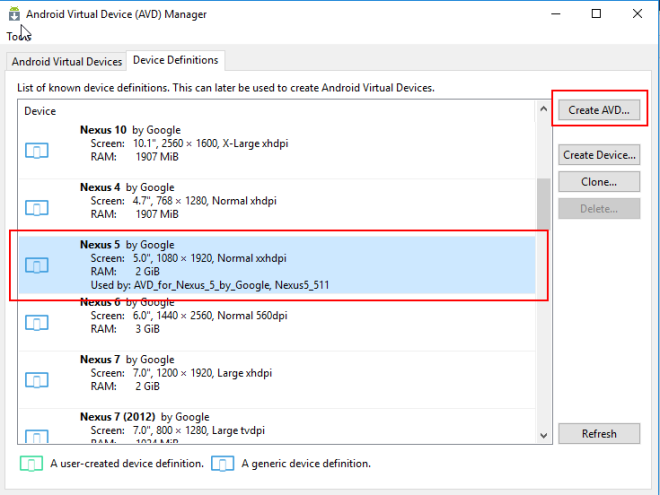
- Search for Nexus 5 device and click Create AVD button.
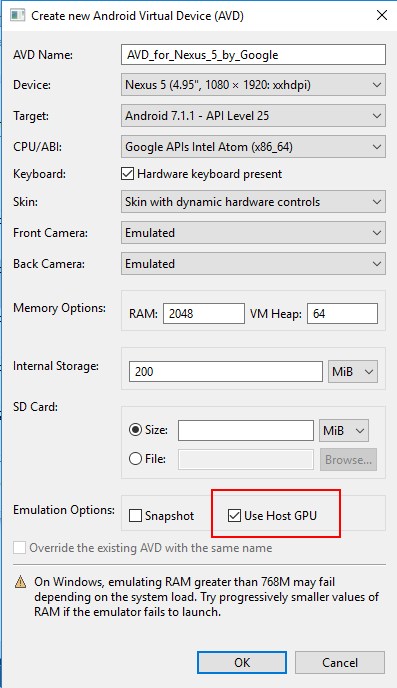
- Create AVD dialog will be show. In this dialog, you can configure the settings of the AVD. Set the settings as the following screenshots. Remember to Check setting Use Host GPU, without checking this the AVD will not able to run smoothly. After all settings is configure, click OK button.
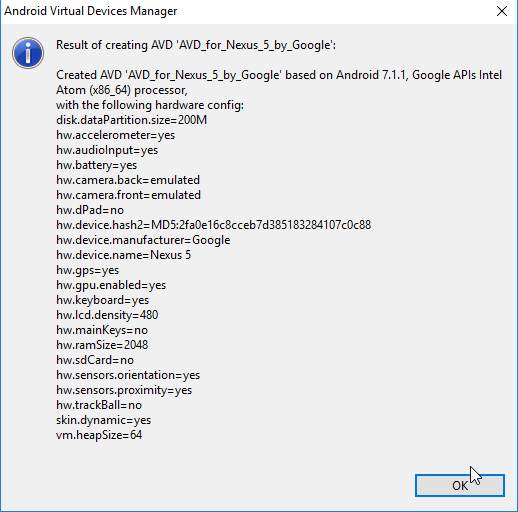
- The AVD will now creating and will show a success dialog after it is completed. Click OK button on the success dialog to close it.
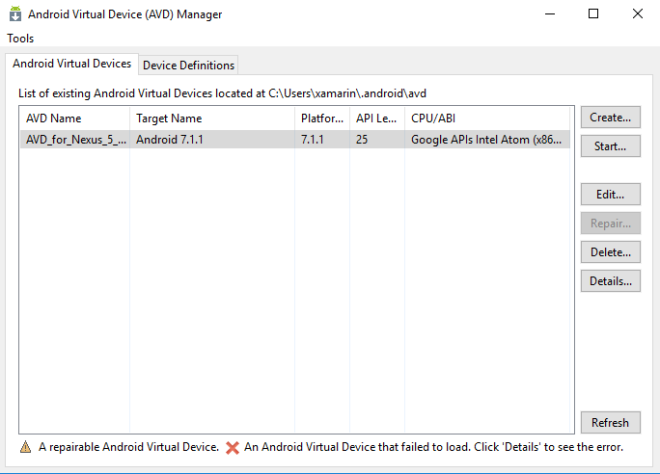
- The AVD is now successfully added. You can check it under Android Virtual Devices tab.
- After the AVD is configure, you will see the AVD is available in the device selection for deploy.

- If you need more information about how the AVD works and some detail explanations, please refer HERE.
You can find the other parts of the guide here:
Setup and Install Xamarin for Visual Studio 2015: Android SDK
Previously there is some errors when installing Android SDK during Visual Studio installation. We are going to fix that problem today. Before we start, let’s have some checking on what is not working.
Open Visual Studio 2015, Click on Tools>Android>Android SDK Manager. Nothing is happening.
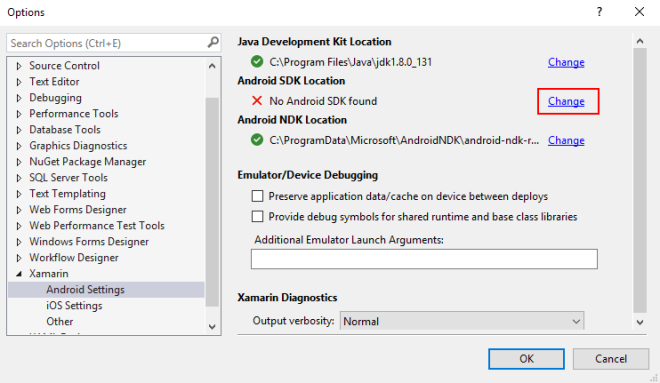
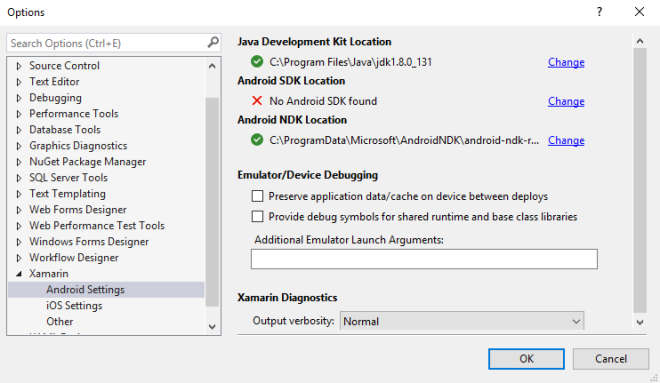
First thing to check is whether the Android SDK path is specify in Options. So, let’s go to Tools>Options>Xamarin>Android Settings. You will notice that there is showing “No Android SDK found”
Now let’s start with the steps to fix the Android SDK.
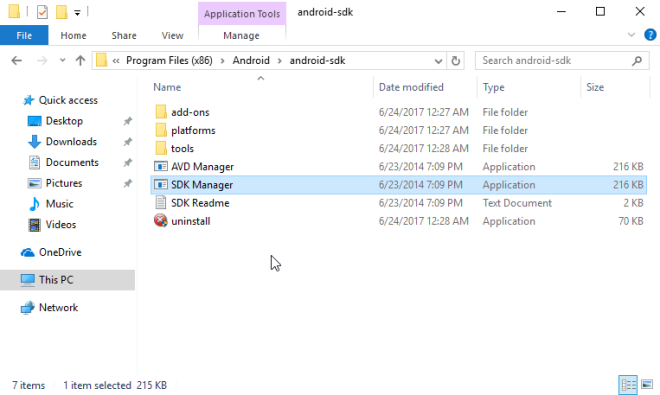
- Open File Explorer and go to C:\Program Files (x86)\Android\android-sdk (default installation path of Visual Studio installer). In my case, the Android SDK is actually installed in the path but it is not setup correctly in Visual Studio. If you cannot find the Android SDK in the path, you can download it from GitHub and get android-sdk-initial folder.
- Let’s try to add the path into Options. Open Visual Studio and go to Tools>Options>Xamarin>Android Settings. Then click on Change button.
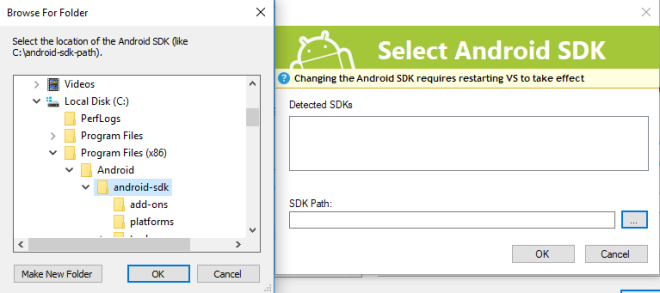
- Specify the Android SDK path as C:\Program Files (x86)\Android\android-sdk and click OK button.
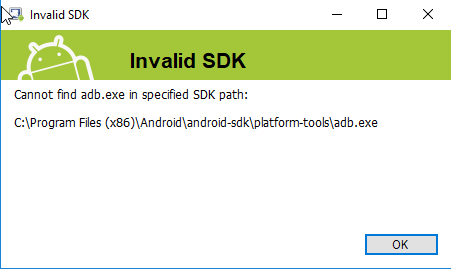
- However, there is some error is pop up saying “Cannot find adb.exe in specified path: …”. This is because the Android SDK Manager that ship with Visual Studio 2015 is outdated. We will need to update it first before we continue.
- Go back to File Explorer with the Android SDK Manager. Double click on SDK Manager to RUN it.

- You should be seeing Android SDK Manager dialog. It might take some time if your machine is slow.
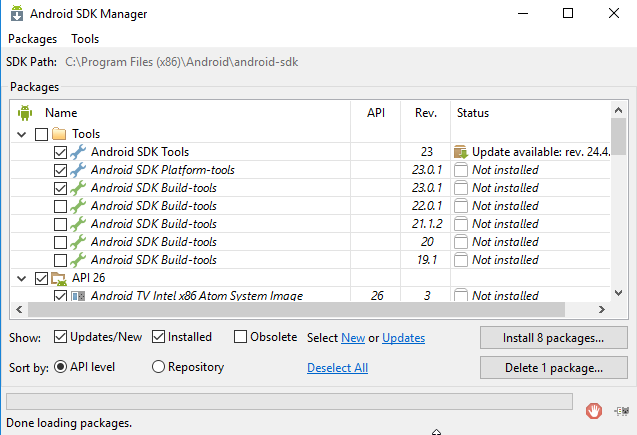
- Uncheck everything. Then check only the following:
– Android SDK Tools
– Android SDK Platform-tools
– Android SDK Build-tools (I don’t think this is necessary, but I just install it :D)
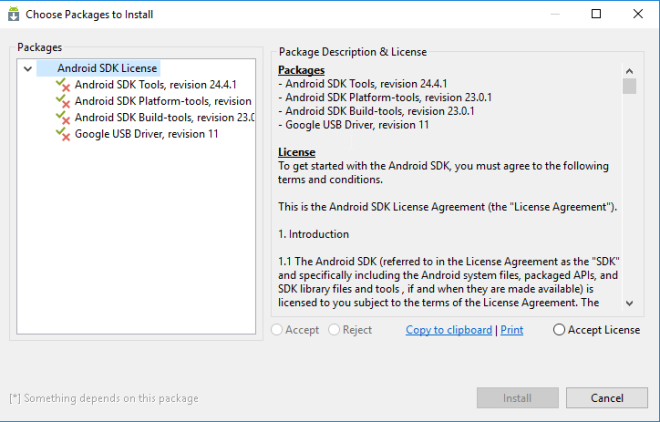
- Click Install 2 packages and accept the terms to proceed the installation.
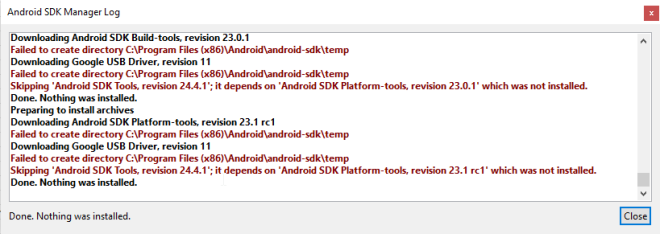
- However, if you are using Windows 10 like I am, you should be having error to install the packages. The error is reporting “Failed to create directory C:\Program Files (x86)\Android\android-sdk\temp”. This is because you will need to have Administrator rights to work in Program files folder.
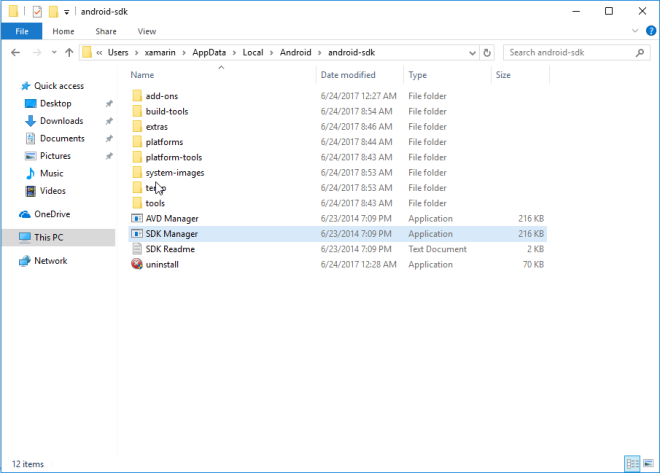
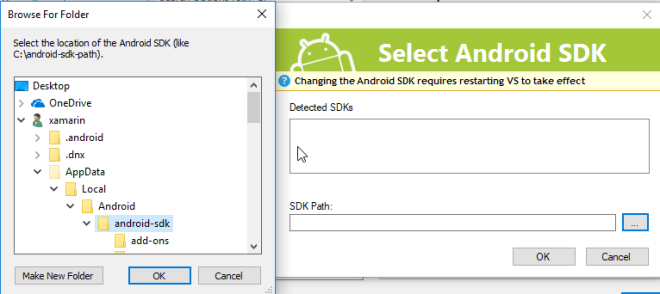
- What I normally do is put the Android SDK to other location. In this guide, I put the Android SDK folder in C:\Users\[username]\AppData\Local\Android\android-sdk
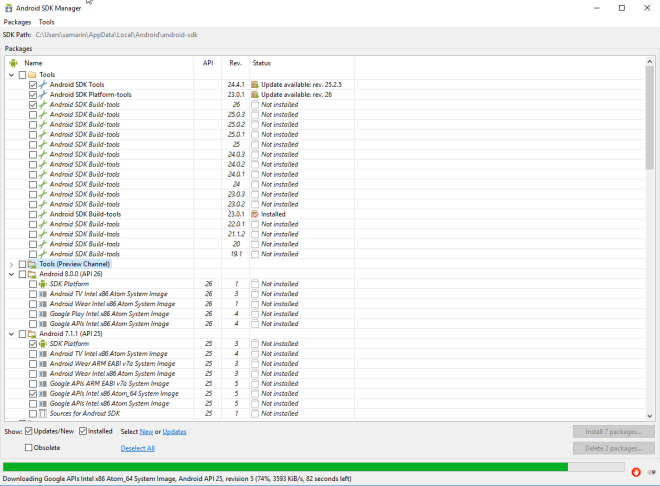
- After moved the folder, RUN the SDK Manager and install the packages. You should be able to install the packages normally and seeing the following status. If you having problem to update the SDK Manager, you can download it from GitHub and get android-sdk-updated folder.

- After complete update the packages, you will need to RESTART the Android SDK Manager. Just close the SDK dialog and reopen it by double clicking the SDK Manager. You will notice that the folder structure of the SDK folder is already updated too.
- After reopen the SDK Manager, you will see more packages is listed.
- Proceed to update and install the remaining packages that we need. Recommended packages to install can be refer to HERE
- After all packages is installed, we may proceed to set the path in Visual Studio. Open Visual Studio, go to Tools>Options>Xamarin>Android Settings. Then click on Change button.
- Specify the Android SDK path as C:\Users\[username]\AppData\Local\Android\android-sdk and click OK button.
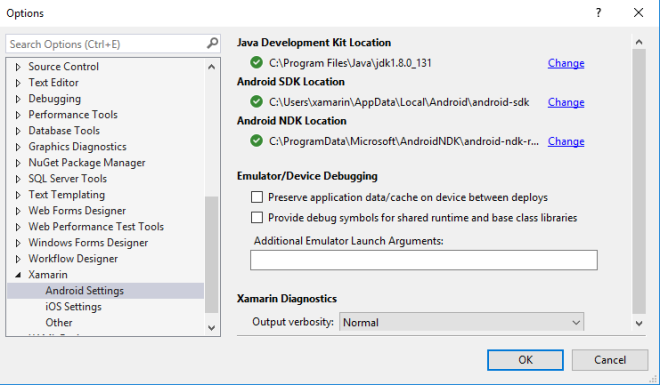
- You should be able to set the Path successfully and seeing a green check mark for Android SDK Location.
- Finally, after so many steps, you are now setup Visual Studio with Android SDK successfully.
You can find the other parts of the guide here:
Setup and Install Xamarin for Visual Studio 2015: JDK Setup
Java Development Kit (JDK) Setup
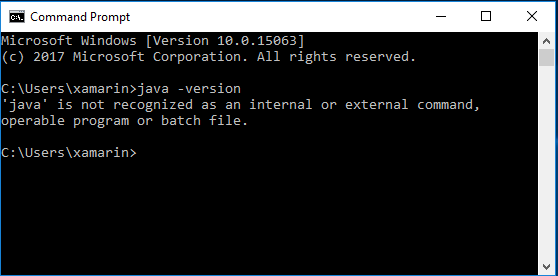
- Open command prompt and type in java -version.
If it is showing ‘java’ is not recognized as an internal or external command, operable program or batch file, it means that we need to install JDK in the machine.
Important: If your java version is less than 1.8, you will also need to update the JDK because the latest Android version needs java 1.8 and above to compile.
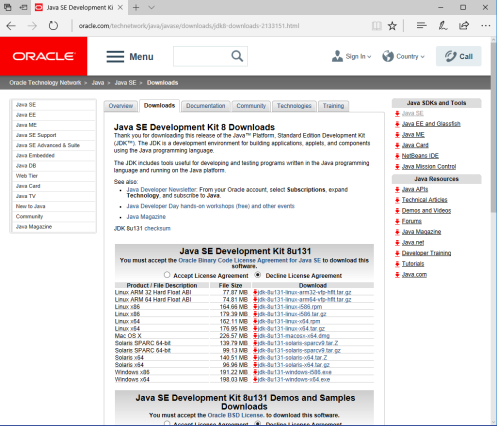
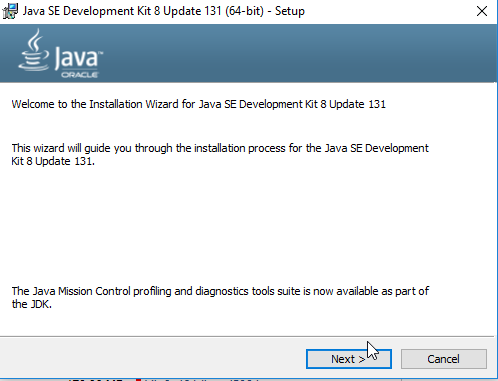
- Download Java SE Development Kit 8 from Oracle site and follow the installation instructions. You might need to restart your machine after the installation of JDK.

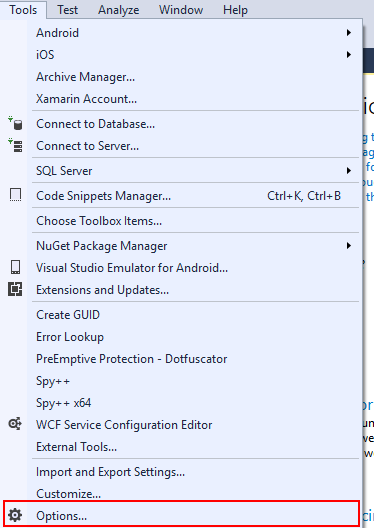
- Open Visual Studio and click on Tools>Options
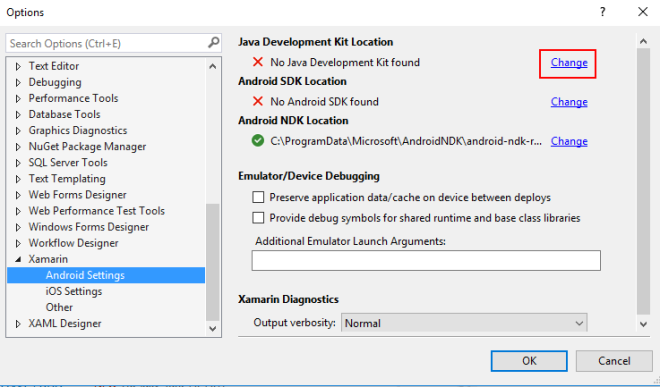
- Options dialog should be prompt up. Navigate to menu Xamarin>Android Settings. Then click Change button beside Java Development Kit Location.
- Select JDK dialog should be prompt up. Select the path that JDK is installed and click OK button.
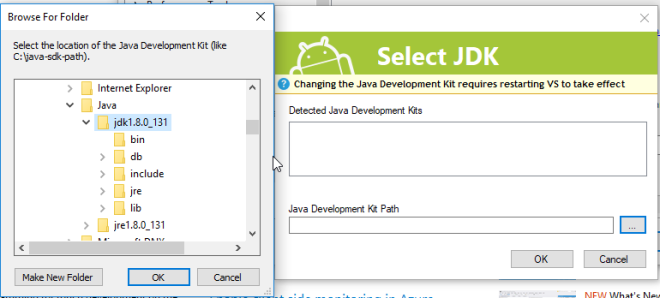
- Java Development Kit Location section should be showing with green check mark.
You can find the other parts of the guide here:
Setup and Install Xamarin for Visual Studio 2015
Recently when I conducting training/workshop, there is quite a numbers of peoples is having problems with Xamarin installation. My machine is setup with Xamarin long time ago and I only deal with updates all the time. So, I am wondering is there really so much problem with Xamarin installation. I decided to give it a try to check it out.
Visual Studio Installation with Xamarin
- Download Visual Studio 2015 installer and RUN. You will not able to download VS2015 community now from visualstudio.com (Only VS2017 is available now). I downloaded mine from MSDN subscriber download section. The details of the installer I use for this guide:
Visual Studio Community 2015 with Update 3 (x86 and x64) – Web Installer (English)
Released: 6/27/2016
en_visual_studio_community_2015_with_update_3_x86_x64_web_installer_8922963.exe - After the installer is appear and complete some of the initialization steps, you should see a page with as image below. Please select Custom as the type of installation. After that, click on Next button.

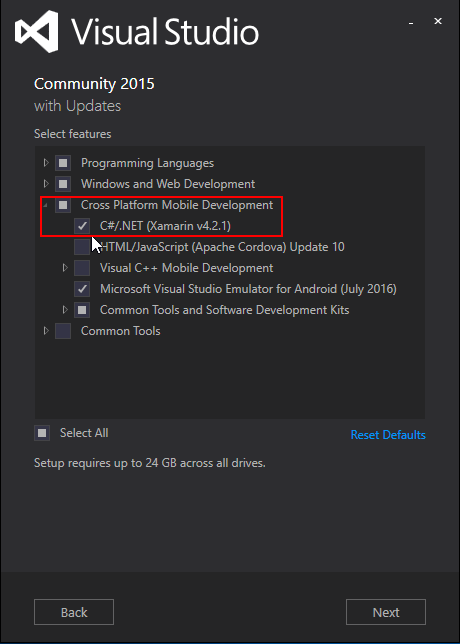
- You should see a page with list of features to select. Please expand Cross Platform Mobile Development and SELECT C#/.NET (Xamarin v4.2.1). After you select it, a few other features will be auto selected too. After that, click on Next button.
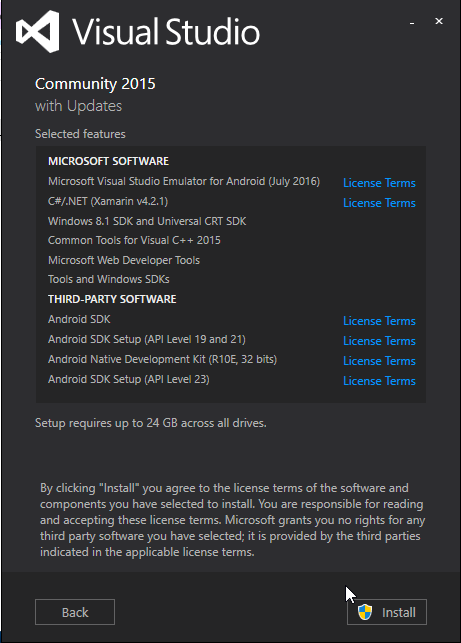
- The next page will be a pages to confirm your selected features. Just click on Install button.
- Please wait for the installation to finish. Make sure you are connected to the internet because the installer will download the components for installation.
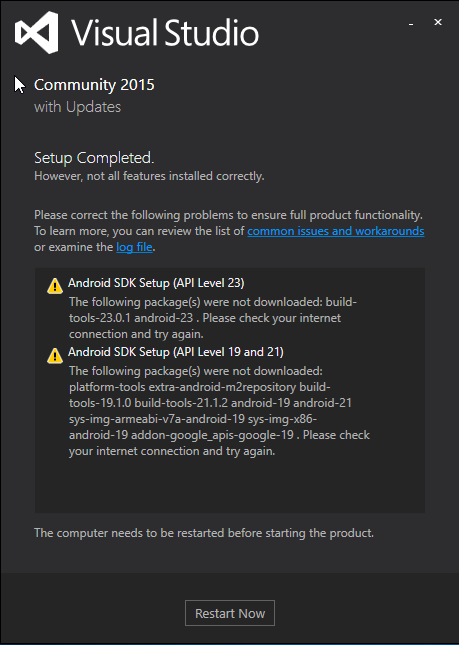
- After the installation completed, you should be seeing the following screen. I’m having 2 warnings regarding Android SDK Setup. I will explain in next guide on how to fix the Android SDK.
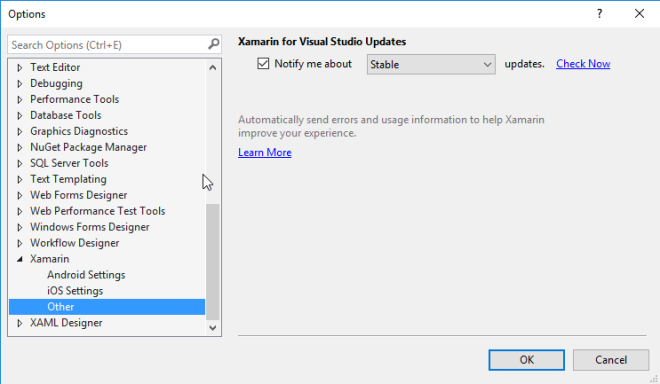
- After installed, open Visual Studio and go to Tools>Options. Then select Xamarin>Other in left pane. Click on Check Now button to check for updates.
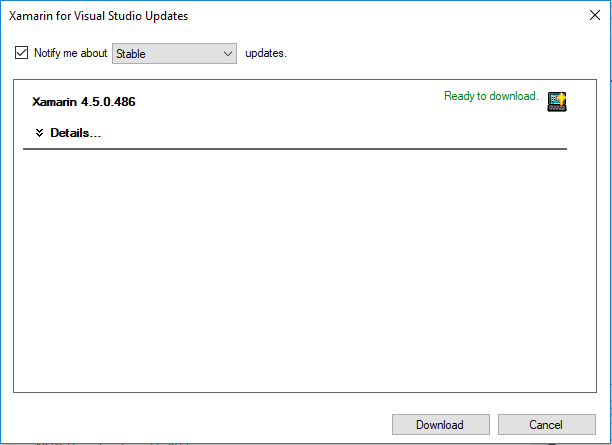
- Xamarin for Visual Studio Updates dialog is show. Download updates available and install it.
You can find the other parts of the guide here:
