Previously there is some errors when installing Android SDK during Visual Studio installation. We are going to fix that problem today. Before we start, let’s have some checking on what is not working.
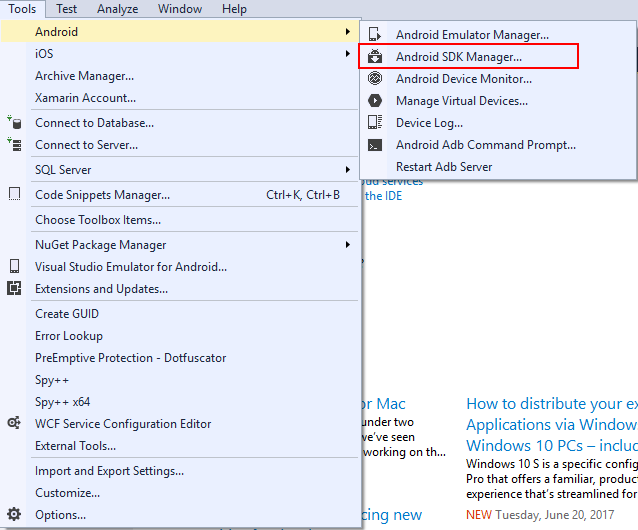
Open Visual Studio 2015, Click on Tools>Android>Android SDK Manager. Nothing is happening.
First thing to check is whether the Android SDK path is specify in Options. So, let’s go to Tools>Options>Xamarin>Android Settings. You will notice that there is showing “No Android SDK found”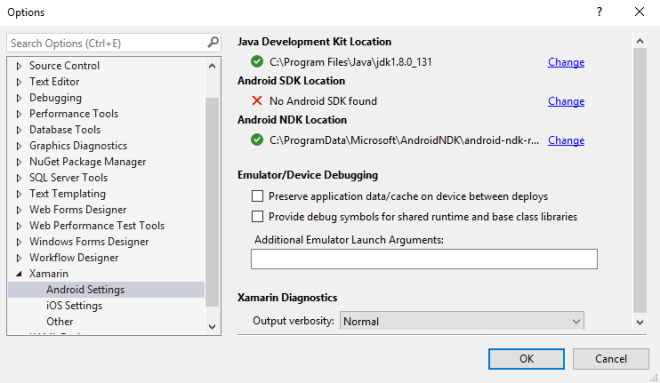
Now let’s start with the steps to fix the Android SDK.
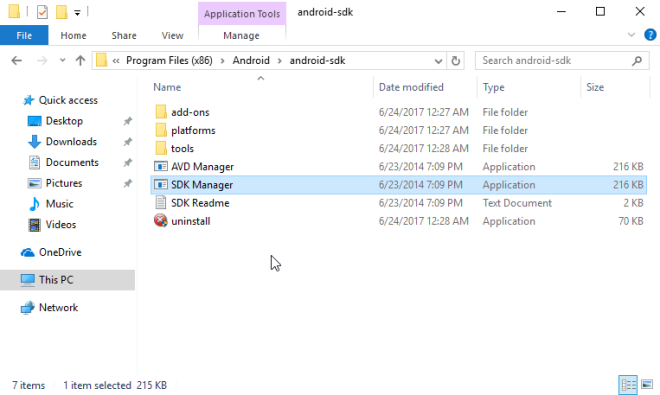
- Open File Explorer and go to C:\Program Files (x86)\Android\android-sdk (default installation path of Visual Studio installer). In my case, the Android SDK is actually installed in the path but it is not setup correctly in Visual Studio. If you cannot find the Android SDK in the path, you can download it from GitHub and get android-sdk-initial folder.
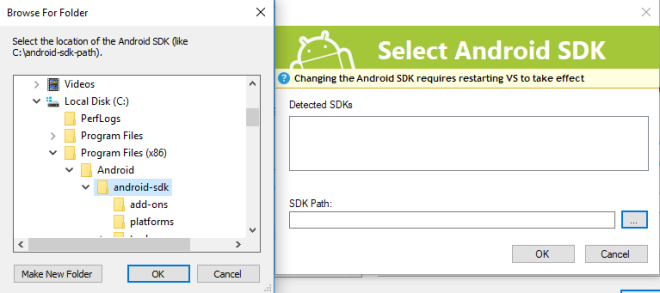
- Let’s try to add the path into Options. Open Visual Studio and go to Tools>Options>Xamarin>Android Settings. Then click on Change button.
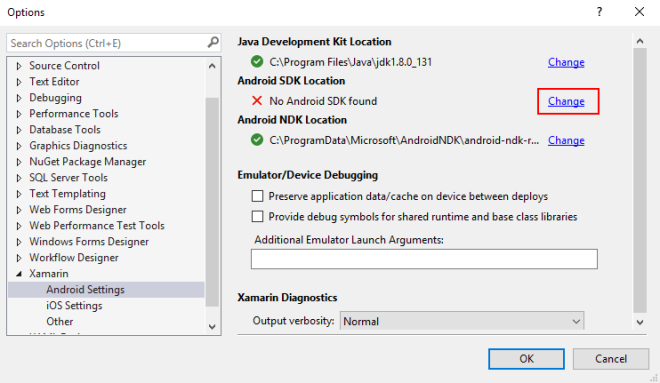
- Specify the Android SDK path as C:\Program Files (x86)\Android\android-sdk and click OK button.
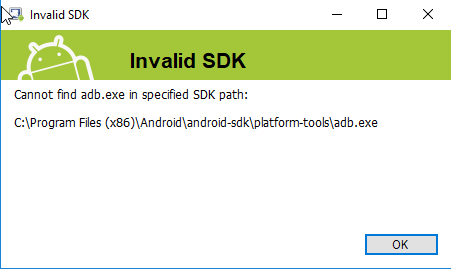
- However, there is some error is pop up saying “Cannot find adb.exe in specified path: …”. This is because the Android SDK Manager that ship with Visual Studio 2015 is outdated. We will need to update it first before we continue.
- Go back to File Explorer with the Android SDK Manager. Double click on SDK Manager to RUN it.

- You should be seeing Android SDK Manager dialog. It might take some time if your machine is slow.
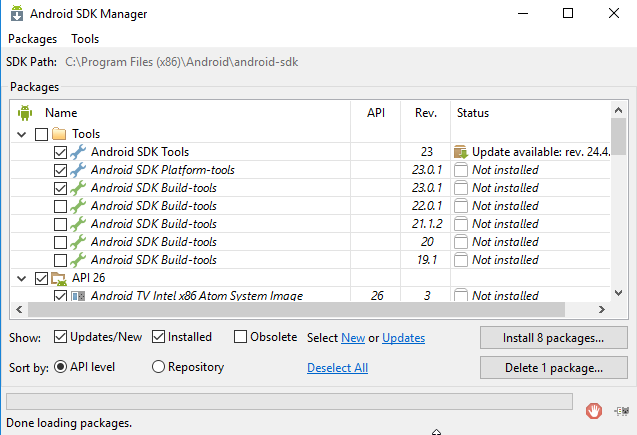
- Uncheck everything. Then check only the following:
– Android SDK Tools
– Android SDK Platform-tools
– Android SDK Build-tools (I don’t think this is necessary, but I just install it :D)
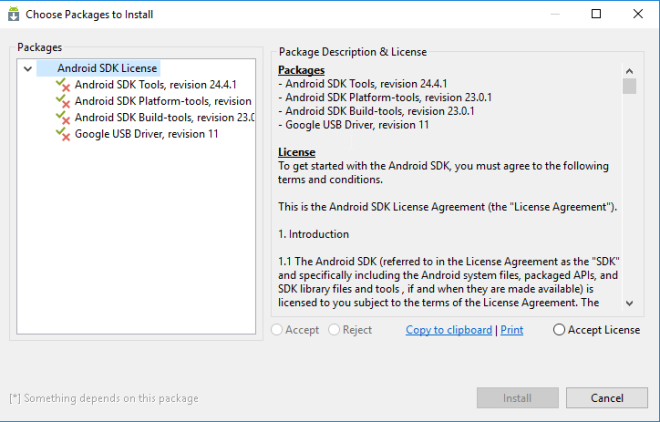
- Click Install 2 packages and accept the terms to proceed the installation.
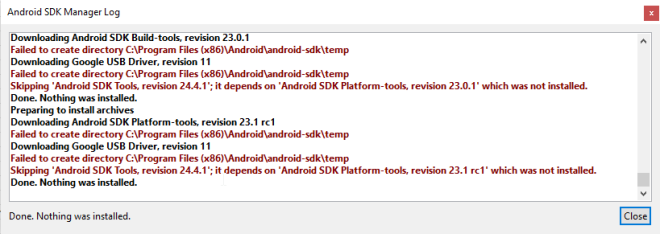
- However, if you are using Windows 10 like I am, you should be having error to install the packages. The error is reporting “Failed to create directory C:\Program Files (x86)\Android\android-sdk\temp”. This is because you will need to have Administrator rights to work in Program files folder.
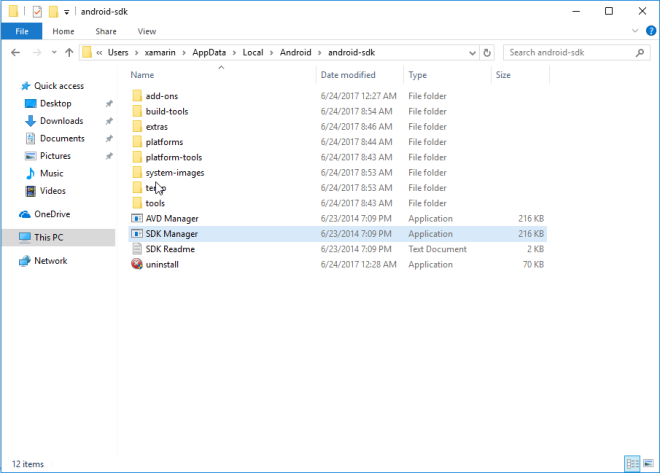
- What I normally do is put the Android SDK to other location. In this guide, I put the Android SDK folder in C:\Users\[username]\AppData\Local\Android\android-sdk
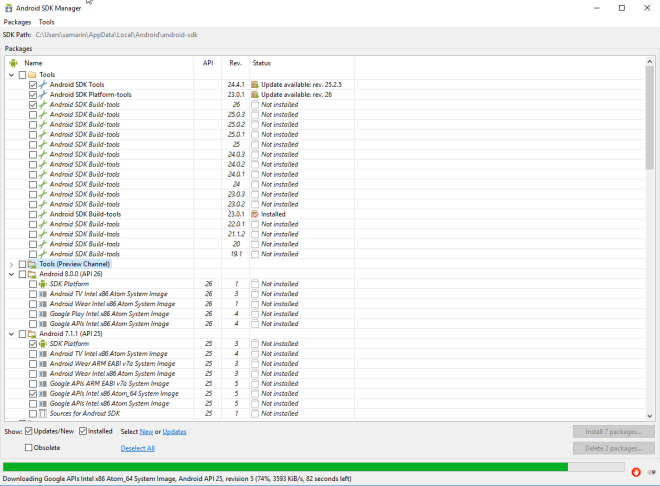
- After moved the folder, RUN the SDK Manager and install the packages. You should be able to install the packages normally and seeing the following status. If you having problem to update the SDK Manager, you can download it from GitHub and get android-sdk-updated folder.

- After complete update the packages, you will need to RESTART the Android SDK Manager. Just close the SDK dialog and reopen it by double clicking the SDK Manager. You will notice that the folder structure of the SDK folder is already updated too.
- After reopen the SDK Manager, you will see more packages is listed.
- Proceed to update and install the remaining packages that we need. Recommended packages to install can be refer to HERE
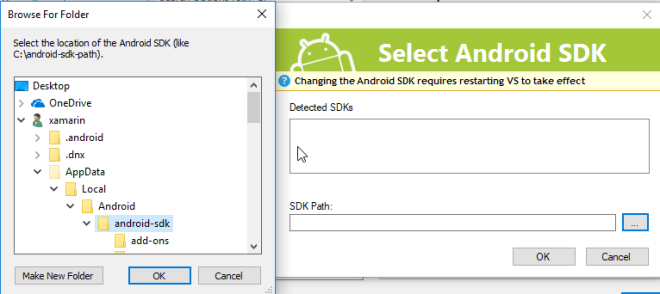
- After all packages is installed, we may proceed to set the path in Visual Studio. Open Visual Studio, go to Tools>Options>Xamarin>Android Settings. Then click on Change button.
- Specify the Android SDK path as C:\Users\[username]\AppData\Local\Android\android-sdk and click OK button.
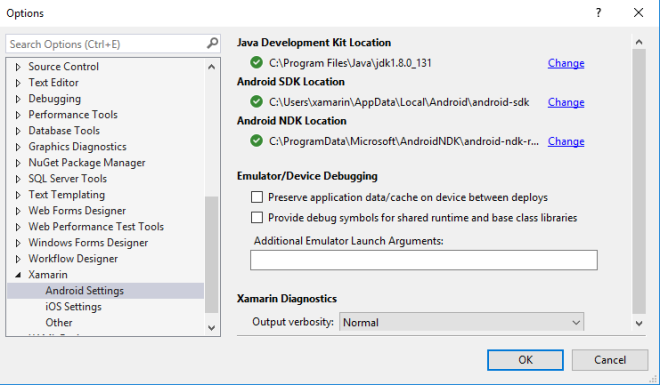
- You should be able to set the Path successfully and seeing a green check mark for Android SDK Location.
- Finally, after so many steps, you are now setup Visual Studio with Android SDK successfully.
You can find the other parts of the guide here:
